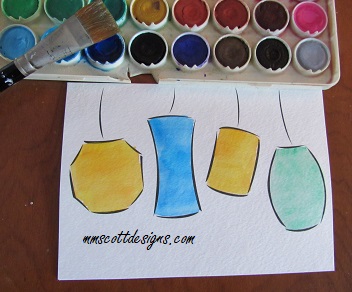
This paper lantern watercolor card is one of the ones I mentioned in my previous post. It is from the set I bought a very long time ago at the art museum store.
As before, the design is already printed on the watercolor card. You can do the same thing using a permanent, non-water-soluble marker. I use watercolors to fill in the shapes, you can also use markers, crayons, acrylics, basically whatever materials you have on hand.
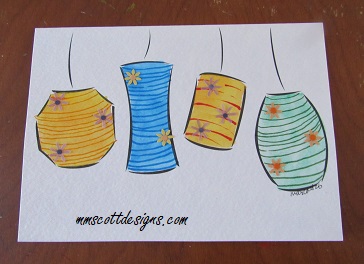
To add dimension to the images I pressed a napkin to ‘lift’ the color randomly. Another technique to add interest is to color the areas near the edge darker than the center. If you are using wet media, let it dry completely before adding the line details.
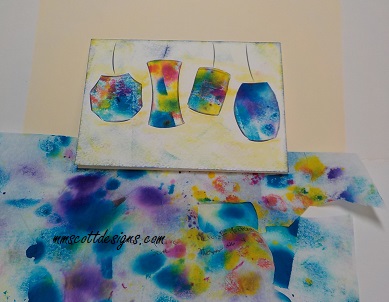
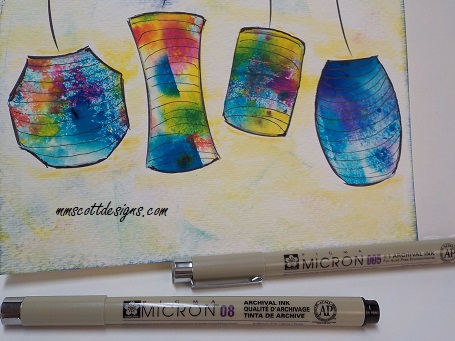
I added the curved lines using a fine tip marker. The tiny paper flowers are leftovers from a previous project. If you do not have pre-cut flowers or a flower paper punch, you can use a standard paper punch and scallop the edges.Another easy technique is to use deli or tissue paper. I spread deli tissue around my spray ink projects to protect the table from the over-spray. As you can see, the end result is a brightly colored scrap paper that I use in other projects. A bit of recycling. For this paper lantern card, instead of painting the images on the card I cut the lantern shapes from the deli paper and glued them onto the card. I added a few lines for texture and the card is done.
Piñatas are another fun theme for this style of card. You can cover the images with tissue paper scraps.
I hope this gives you a few ideas to apply to your card making projects. Have fun experimenting